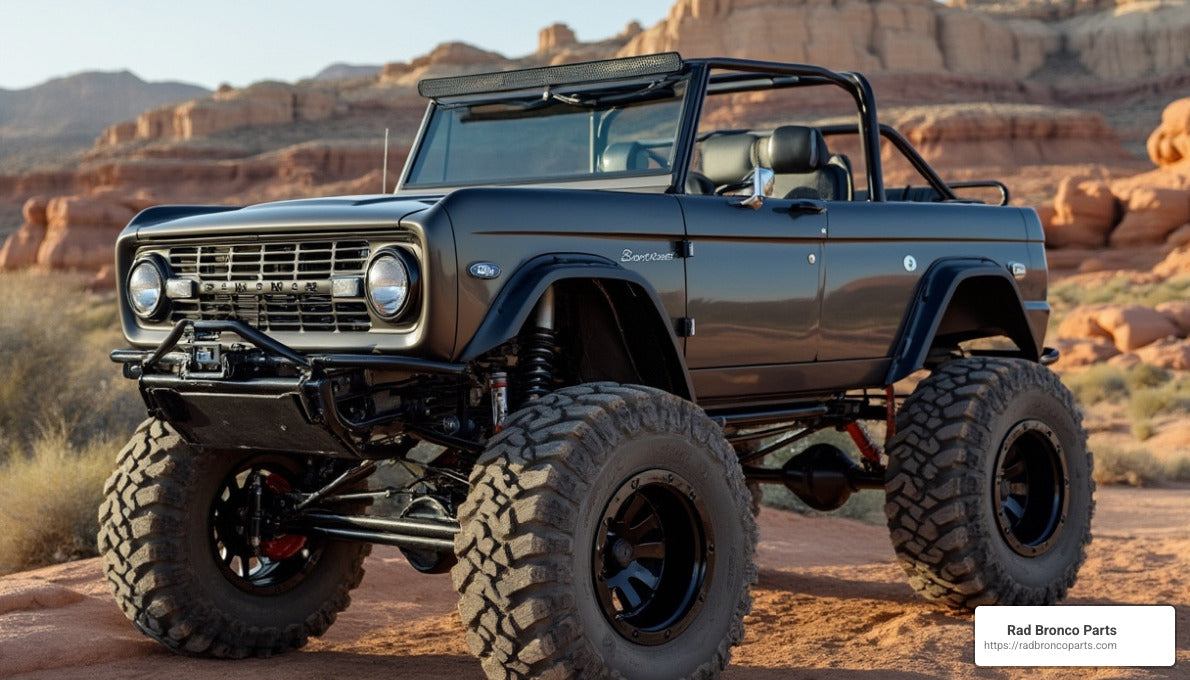
Why Ford Bronco Lift Kits Are Essential for Off-Road Trips
Considering enhancing your Bronco's performance and tackling tougher trails? Ford Bronco Lift Kits provide the extra ground clearance and improved suspension performance needed for safer, more capable off-road journeys. Here's a quick overview:
- Better Ground Clearance: Avoid obstacles that could otherwise damage your vehicle.
- Larger Tires: Allows for bigger, more aggressive tires for improved traction.
- Improved Approach & Departure Angles: Steer steep inclines and declines safely.
- Improved Off-Road Performance: Better articulation and stability on uneven terrain.
I'm Robert Resz, owner of Rad Bronco Parts and a passionate off-road enthusiast. I've spent years installing, designing, and testing Ford Bronco Lift Kits, changing countless Broncos into trail-ready beasts.

Ford Bronco Lift Kits terms explained: - 2025 bronco 2 inch lift - 2025 bronco 3 inch lift - 2025 bronco 4 inch lift
Step 1: Gather Necessary Tools and Materials for Your Ford Bronco Lift Kit Installation
Before diving into your Bronco lift kit installation, let's take a moment to plan ahead. At Rad Bronco Parts, we like to remind our customers that "Proper preparation prevents poor performance." Trust me—it's far better to spend a little extra time preparing than to drive back and forth to the hardware store mid-project!
Having the right tools handy is key for ensuring a smooth installation. We've installed countless Ford Bronco Lift Kits and learned exactly which tools help the job go smoothly. Here’s a quick rundown of essentials you'll want within arm’s reach during the installation.
Essential Tools You'll Need
As you get ready to lift your Bronco, you'll want to ensure your toolbox is stocked with a selection of metric and standard wrench sets ranging from 8mm to 22mm. You'll also want handy socket sets (both deep and shallow sockets), a reliable ½" drive ratchet (with extensions), and a sturdy ½" drive torque wrench rated for at least 150 ft-lbs.
To safely lift and secure your Bronco, pick up a quality floor jack rated for your vehicle’s weight, along with jack stands (go for at least 2-ton capacity—though we recommend using four for safest results). If your specific lift kit includes coil springs, you’ll need coil spring compressors as well.
You'll likely encounter some stubborn components, so keep a breaker bar and ball-joint separator (also called a "pickle fork") nearby. Other handy tools include pliers, a flat head screwdriver, and thread-locking compound to secure bolts.
And let's not forget safety gear! Protect your hands with mechanic’s gloves, your eyes with safety goggles, and your feet with steel-toed boots (highly recommended). A stack of shop rags and a first aid kit nearby never hurt either—we hope you won't need it, but better safe than sorry.

Some optional—but extremely helpful—items include an impact wrench (battery or pneumatic), penetrating oil for loosening rusty bolts, a shop light or headlamp for better visibility, and a magnetic parts tray so you don't lose small hardware pieces.
Andy F., one of our happy customers, shared after completing his Bronco lift kit install: "This kit is super nice, parts are very heavy duty. My Bronco rides amazing. Makes my truck look like a monster! Having all the right tools made the installation go smoothly."
Choosing the Right Ford Bronco Lift Kit
Selecting the ideal Ford Bronco Lift Kit for your vehicle and needs is just as important as gathering your tools. Lift kits aren't one-size-fits-all—choosing the proper kit ensures you'll gain maximum performance and safety.
First things first: decide on your desired lift height. The most popular choices include 1-2 inch lift kits, ideal for those seeking improved looks and slightly bigger tires without major modifications. For more serious trailblazing, a 3-4 inch lift kit lets you run tires up to 35 inches, significantly enhancing clearance. If you’re an extreme off-road enthusiast looking for maximum ground clearance, you might consider going big with a 5-6 inch kit—just know that this requires substantial adjustments to your suspension and drivetrain.
Next, check kit compatibility with your Bronco model. Kits are often designed specifically for Base models, Broncos with the Sasquatch Package, Badlands, Wildtrak, First Edition models, or vehicles equipped with or without the HOSS suspension system. Confirming compatibility ensures a great fit and optimal performance.
Be sure to look at the build materials as well. High-quality components like CNC-machined, aircraft-grade billet aluminum can make a huge difference in durability and performance. Also, pay attention to the manufacturer's warranty—a generous warranty often reveals a reputable brand that stands behind its product.

Jay M., who recently installed his own Ford Bronco Lift Kit, raved about it: "Very well designed product. Very good lift. These guys thought of everything that you might need and included it in a lift kit."
Choosing the right lift kit is crucial for both performance and safety. Take your time to review customer reviews and professional recommendations. After all, your Bronco deserves nothing less than the best!
Step 2: Prepare Your Ford Bronco for Lift Kit Installation
Before you jump into installing your new Ford Bronco Lift Kits, taking a bit of extra time to prepare both your Bronco and your workspace can make the whole process smoother—and a whole lot safer. Trust me, a little prep work now can save you a lot of headaches later!
Start by choosing a good spot for your installation. Ideally, you want a flat, level concrete surface that's well-lit and gives you plenty of room to move around. A garage or covered area works best, so you're protected from rain, sun, or wind during your installation.
Next up, give your Bronco a good wash—especially underneath. Cleaning the undercarriage helps you spot bolts, nuts, and suspension parts easily. Plus, it prevents dirt and grime from getting in your eyes (or on your favorite shirt) when you're working.
Now, grab your vehicle's manual along with the instructions that came with your lift kit. Having these documents handy means fewer interruptions down the line. You'll thank yourself later when you're not scrambling around looking for torque specs or diagrams halfway through the process.
Safety first! Before doing anything else, go ahead and disconnect your Bronco's battery. Find your battery in the engine compartment, and carefully disconnect the negative (black) terminal first, then the positive (red) terminal. This simple step prevents accidental electrical shorts or, heaven forbid, setting off an airbag while you're working.
Here's a pro tip: while your Bronco is still firmly on the ground, loosen up the lug nuts on each wheel. Don't fully remove them yet—just break them loose. It’s far easier (and safer) to do this step now rather than wrestling with stubborn lug nuts once your Bronco is up on jack stands.
Before diving in deeper, take a few minutes to thoroughly read through your lift kit's instructions. Create a clear mental picture of each step ahead. Like Garrett Hopson, one of our happy customers, shared after installing his lift kit: "You can tell that quality lift kits take pride in what they do. Hands down, it's a night and day difference over factory suspension. Our first trail ride ate up every bump and rock the road threw at us."
Safety Precautions to Consider
Safety should always be your number one priority—no exceptions. Here's how to keep yourself (and your Bronco) protected throughout the installation process.
When it's time to lift your Bronco, use a high-quality floor jack. Position the jack carefully at the recommended lifting points found in your owner's manual. Once your vehicle is raised, never rely solely on the hydraulic jack to hold it up. Instead, secure your Bronco with sturdy jack stands rated for your vehicle’s weight. Place these stands under the frame at designated support points, then gently lower the Bronco onto them and double-check that everything feels stable.

Also, make sure your Bronco won’t roll away while you're working. Use wheel chocks on the wheels still touching the ground. Place chocks both in front of and behind those wheels for maximum safety.
Don't forget your personal protective equipment (PPE). Wear sturdy gloves, safety goggles, and comfortable clothing that covers your arms and legs. Yes, you might feel a bit overdressed for the garage, but your skin will thank you later!
Try to keep your workspace neat, clean, and well-ventilated. This is especially important if you're using chemical sprays like penetrating oil or lubricants.
Lastly, it's always a smart idea to have a friend or family member help out. Not only does an extra set of hands make the work easier, but another set of eyes helps catch things you might miss. Plus, it's more fun with company!
And just in case, keep a fire extinguisher and first aid kit close by. Accidents are rare, but it never hurts to be prepared.
Taking the time to prepare properly makes your entire installation go smoothly. Plus, it helps ensure your Bronco will ride safely and perform at its best once you've installed your new lift kit from Rad Bronco Parts. Remember our motto: "Prepare thoroughly, install once!"
Step 3: Remove the Existing Suspension Components
With your Bronco safely lifted and securely supported, it's time to start disassembling the stock suspension components. This step is crucial to making room for your new Ford Bronco Lift Kit, so take your time and approach it methodically. It's perfectly normal to feel a bit nervous at this stage—but don't worry, we'll guide you through each step clearly.
Before you start removing parts, it's a smart idea to take a few clear photos of your suspension. Grab your smartphone and snap pictures from various angles. These photos can become your best friends if you need a reference later on during reassembly.
To stay organized, label each part as you remove it. Using Ziploc bags or containers and a marker will help you avoid the dreaded "leftover bolts" scenario after installation (trust us, that's no fun).
Detailed Steps for Disassembling Your Bronco's Suspension
We'll tackle the front suspension first, then move to the rear. Here's how to do it:
Front Suspension Disassembly:
Start by fully removing the wheels—you already loosened the lug nuts earlier, so this part should be easy. Set the wheels aside safely.
Next up, disconnect the sway bar links. You'll find these connecting your sway bar to the lower control arms. Simply remove the bolts at the top and bottom ends and set the links aside (clearly labeled, of course!).
If your lift kit instructions recommend removing the brake calipers and rotors for easier access, carefully unscrew the caliper mounting bolts. Gently lift the caliper away from the rotor—never let it hang by the brake line! Instead, use a wire or bungee cord to hold it safely out of the way. Remove the rotor as well, if needed.
After that, disconnect your shock absorbers or strut assemblies. If your Bronco uses struts, begin by loosening the three upper mounting nuts inside the engine compartment. Next, remove the lower mounting bolt connecting the strut to the lower control arm. If your Bronco has standard shocks, just remove the mounting bolts at the top and bottom ends.
Now it's time to disconnect the upper ball joints. First, take out the cotter pin and unscrew the castle nut. Using a ball joint separator tool (sometimes called a pickle fork), carefully separate the ball joint from the steering knuckle. If you're having trouble with stubborn parts, a quick spray of penetrating oil can work wonders—just give it a few minutes to soak in.
Finally, it's time to remove the coil springs. This step requires caution. Use your coil spring compressor to safely compress the spring until tension is relieved. Once compressed, carefully lift out the coil spring. Slowly release the tension on the spring compressor afterward, keeping control of the spring at all times.
Rear Suspension Disassembly:
Moving on to the back of your Bronco, start by placing a sturdy floor jack under the rear differential. This jack will support the axle during the next steps, keeping things safe and stable.
Now disconnect the rear shocks by removing their mounting bolts at top and bottom. With the bolts removed, gently slide out the shocks and place them safely aside.
Slowly and carefully lower the rear axle using your floor jack until there's no tension on the springs. Take it slow—keeping an eye on brake lines, ABS sensors, and wiring to make sure nothing stretches or gets damaged.
Depending on your Bronco's suspension setup, you'll either have leaf springs or coil springs. If you're working with leaf springs, remove the U-bolts connecting them to the axle, followed by the bolts at the front and rear mounting points. If your Bronco has coil springs, disconnect the lower control arms first, then carefully remove the springs once the axle has enough clearance.
Throughout this entire process, keep checking your brake lines, ABS sensors, and electrical connections to ensure they aren't getting stretched or damaged. It's always better to pause and reassess if something seems off rather than pushing forward and risking potential headaches later.
As you remove each component, inspect it closely. Look for any corrosion, excessive wear, or damage to bushings, ball joints, or hardware. Now is the perfect opportunity to replace worn-out components that could compromise your Bronco's performance after installing your new lift kit.

Ivan Montaño, a satisfied Bronco owner who recently completed his lift kit installation, shares his experience: "When I finally installed it and saw the Bronco for the first time, my first impression was that it looked amazing. But the best of all was trying it. I did not expect the change to be so much."
Take your time, stay organized, and keep safety top of mind. You're almost ready for the exciting step of installing those shiny new Ford Bronco Lift Kit components!
Step 4: Install the New Ford Bronco Lift Kit Components
With the factory suspension out of the way, it's finally time for the fun part—installing your shiny new Ford Bronco Lift Kit! This is where your Bronco transforms from ordinary to trail-ready. Take your time, follow the instructions provided with your lift kit carefully, and don't rush the process. Let's break down the installation for the front and rear suspension so you can confidently tackle each step.
Front Suspension Installation with Ford Bronco Lift Kits
First, start by installing your new lifted coil springs or strut spacers. If your kit features taller coil springs, carefully position them into the original spring perches, ensuring they're properly seated and oriented. For kits using strut spacers, simply place them on top of your factory struts, following your manufacturer's instructions closely.
Next up, install your new longer shocks or strut assemblies. Position them carefully and secure them with the supplied hardware. At this stage, don't fully torque them down yet—just snug them up hand-tight for now. You'll torque them properly when your Bronco is back on the ground.
Reconnect those upper control arms to the steering knuckles. If your lift kit includes replacement upper control arms, use those instead of the factory ones—they're specifically designed for your new ride height. Secure them firmly with new castle nuts and cotter pins provided in your kit.
Most lift kits include new, longer sway bar links to accommodate the extra height. Make sure you install these links now, connecting them between the sway bar and lower control arms. Double-check that they're not binding or interfering with other components during suspension travel, ensuring smooth operation.
Throughout this process, it's smart practice to apply medium-strength thread-locking compound to critical bolts. Parts of your suspension see lots of vibration and movement, and thread-locker helps keep everything secure.
Torque specifications matter—a lot! Proper torque ensures your bolts hold firm without causing damage. To help you out, here's a handy table of general torque specs for common Ford Bronco Lift Kit components:
| Component | Torque Specification (ft-lbs) |
|---|---|
| Shock mounting bolts | 65-85 |
| Strut top mount nuts | 30-35 |
| Control arm bolts | 85-110 |
| Sway bar link nuts | 40-45 |
| Ball joint castle nuts | 65-85 |
| Wheel lug nuts | 100-110 |
Always double-check your specific kit's instructions for exact torque values.
Rear Suspension Installation with Ford Bronco Lift Kits
Now let's move to the rear suspension. Start by installing your lift blocks or new leaf springs. If your kit uses lift blocks, carefully position them between your axle and existing leaf springs, ensuring proper alignment with the centering pins. For those using entirely new leaf springs, simply replace your factory springs with the taller leaf packs provided.
Secure the leaf springs or lift blocks firmly to your axle using new U-bolts included in your lift kit. Tighten these evenly in a cross pattern, ensuring everything is aligned and snugged up properly. If your Bronco uses coil springs in the rear, carefully seat the taller replacement springs in the factory spring perches.
Next, install your longer rear shocks. Position these carefully, using the supplied mounting hardware, and again, snug them down hand-tight initially. Check that the shocks aren't overly compressed or stretched beyond their designed limits at your Bronco's new ride height.
Once you've installed the main suspension components, take a moment to check your driveline angles. Lift kits can change the rear driveshaft angle, sometimes requiring additional adjustments. Many kits include carrier bearing spacers or differential drop brackets designed to restore proper driveline alignment. If your kit includes these components, install them now as directed by your manufacturer.
Throughout the installation, keep an eye out for clearances. Make sure brake lines, ABS wiring, and other crucial components have adequate slack at full suspension travel. Nothing ruins a trail ride like a snapped brake line!

As one of our happy customers Jay M. shared after installing his lift kit: "The quality of this kit competes with the best brands in the industry! Not to mention, I have a spare tire carrier as well as a roof top tent; the suggested rear overload spring sits nice and level with all of our gear in/on the vehicle."
The goal here isn't just making your Bronco look awesome (though it sure will!)—it's about making sure everything is installed safely and correctly. Be patient, take your time, and double-check your work as you go. You'll soon be hitting the trails with total confidence, knowing you've installed your Ford Bronco Lift Kit the right way.
Step 5: Reassemble and Finalize the Installation
You're almost there—your Bronco is about to stand taller and tackle trails better than ever! Now it's time to carefully reassemble everything and finalize your Ford Bronco Lift Kit installation. Following these last few steps thoroughly ensures your off-road trips will be safe, smooth, and enjoyable.
First, reinstall your wheels and tires. Place them securely onto the hubs, tightening the lug nuts by hand in a star-shaped pattern. Once they're snug, carefully lower your Bronco back onto the ground. Now grab your torque wrench and tighten the lug nuts fully to the recommended torque specification—usually around 100 ft-lbs. Tightening them evenly in that star pattern helps the wheels seat properly.
Next, double-check all your connections. Take a slow walk around and under your vehicle to ensure everything looks correct. Confirm all bolts and nuts are torqued correctly, suspension components aren't rubbing or binding, and brake lines and wiring are safely secured away from moving parts.
Now, let's reconnect your battery. Always reconnect the positive (red) terminal first, followed by the negative (black) terminal. Give them a gentle tug afterward to ensure they're snugly fitted.
With your Bronco firmly back on its wheels, it's time for an initial alignment check. Stand a short distance away and visually inspect your wheels to see if they look straight. Check the steering wheel—it should be centered. This visual check is a quick safety measure, not a replacement for professional alignment.
Speaking of alignment, don't skip the next step: schedule a professional wheel alignment as soon as possible. After installing any lift kit, getting your wheels professionally aligned is essential. Garrett Hopson, one of our satisfied customers, put it best: "The alignment is critical. Cornering was perfect and smooth after we had it professionally aligned. 10/10 job—I would buy again!"
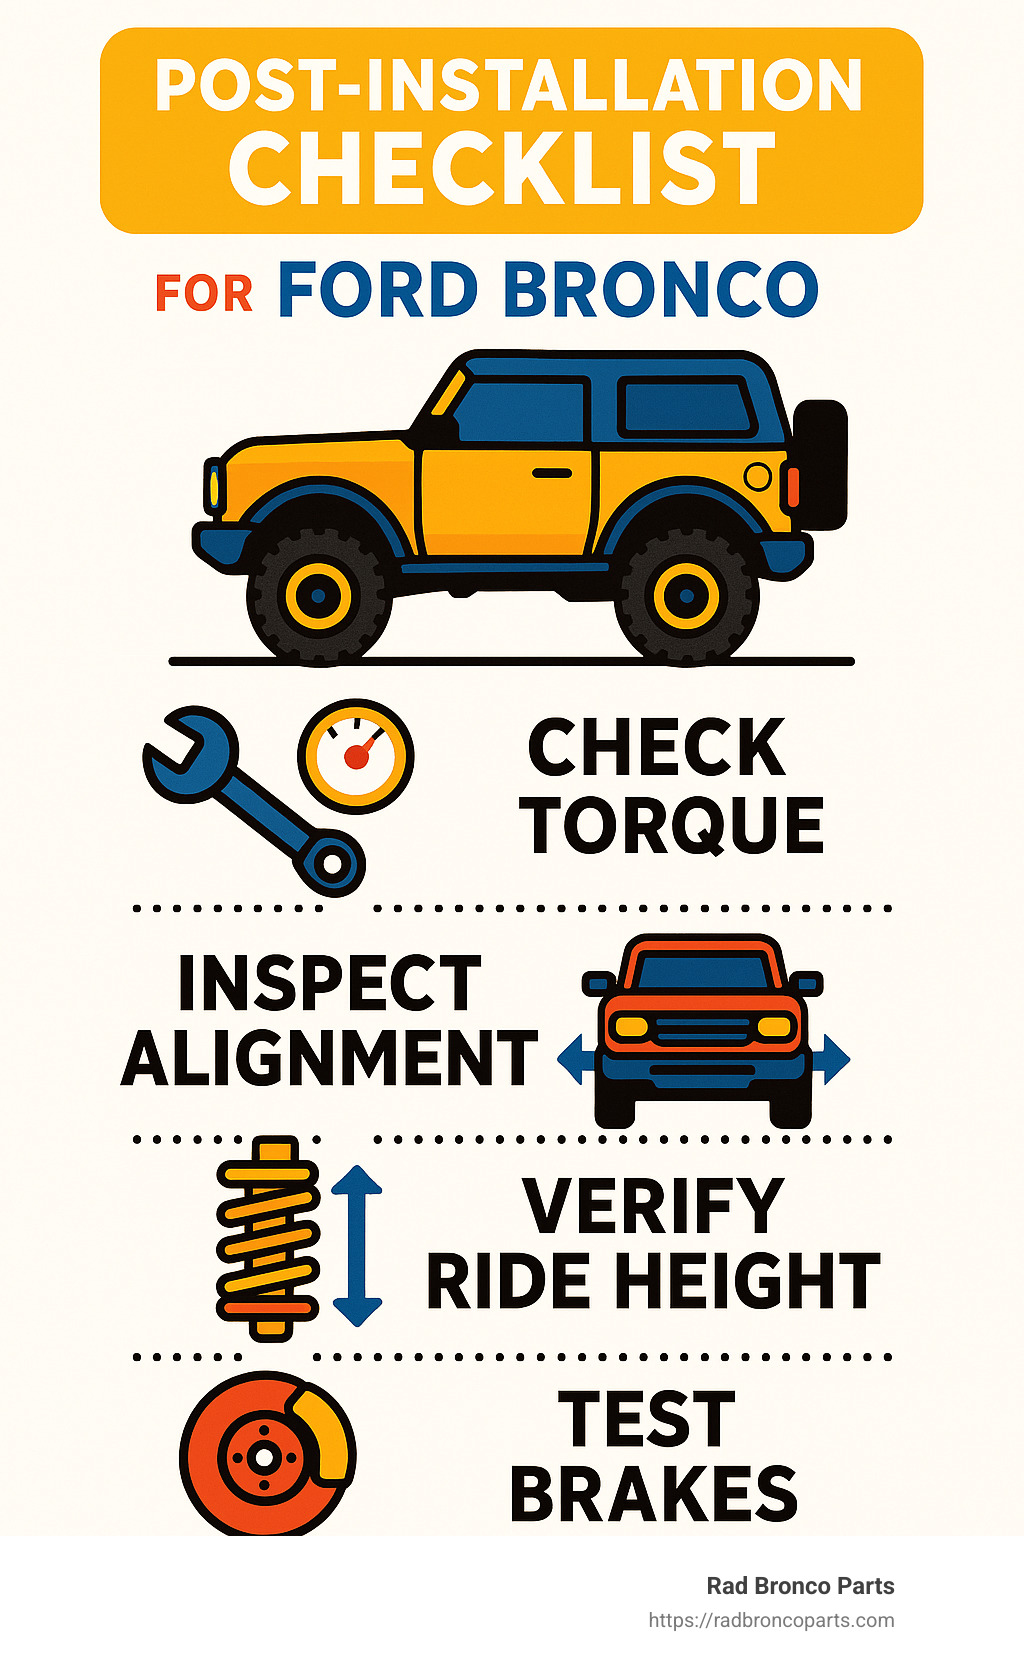
Post-Installation Checks and Maintenance
Just because your Bronco is back on the ground doesn't mean you're quite finished. To ensure the longevity of your lift kit and the safety of your vehicle, follow some key post-installation checks and maintenance procedures.
Start with a gentle test drive around your neighborhood or an empty parking lot. Keep the radio off—it helps you hear any unusual sounds clearly. Be attentive to how your Bronco handles, noting any strange vibrations or pulling to one side. Test your brakes gently to confirm everything is responsive and safe.
New suspension parts will have a settling period. Your Bronco might actually sit slightly higher right after installation, dropping a bit once the suspension settles in after a few hundred miles. Don't worry, this is perfectly normal!
After about 500 miles of driving, it's crucial to retorque all the hardware. This might seem tedious, but tightening everything again ensures no components have loosened during this initial break-in period. Check again around the 3,000 to 5,000-mile mark to be extra safe.
Make it a habit to regularly inspect your suspension components. Every few thousand miles, slide under your Bronco and look for any loose bolts, signs of wear, or potential issues. Catching problems early saves you a lot of hassle (and money!) down the road.
Lastly, keep an eye on your vehicle fluids—particularly your transmission, transfer case, and differential oils. Why? The new suspension geometry might slightly change drivetrain angles, causing potential extra wear in these areas, especially in the beginning. Checking these fluids more frequently early on helps you catch any issues before they become serious.
Ivan Montaño, a proud Bronco owner, shared his experience: "You really feel the high quality. It's the best modification you can put on your Bronco so far. The quality of this kit competes with the best brands in the industry!"
A lift kit transforms more than just your ride height—it improves your Bronco's entire driving experience. Take the time to get accustomed to your Bronco's new stance and handling. Drive cautiously until you're comfortable with the differences. If you ever notice anything unusual, don't hesitate to address it right away.
Your Bronco is now ready for trip, and you're ready to confidently explore new trails. Happy off-roading!
Frequently Asked Questions about Installing Ford Bronco Lift Kits
Can I Install a Ford Bronco Lift Kit Myself?
We hear this question a lot at Rad Bronco Parts, and the short answer is: it depends! Whether or not you should tackle the installation yourself comes down to your experience, tools, available workspace, and how much time you can dedicate.
If you have experience working with suspension systems, own (or can borrow) all the necessary tools, and have a safe, spacious area to work in, then installing your own Ford Bronco Lift Kit is definitely achievable. Many of our customers successfully completed a DIY install, and they loved the satisfaction that came with changing their Bronco themselves.
However, keep in mind that if you're new to vehicle maintenance, suspension work can be tricky and time-consuming—expect anywhere from 8 to 12 hours (or more!) for a first-timer. It's okay to admit if you're unsure or uncomfortable with the job—there's absolutely no shame in having a professional take care of it for you. After all, safety matters above everything else.
Professional installation typically costs between $800 to $1,500, but the peace of mind—and assurance everything is done properly—can be priceless. A professional installer will know precisely how to overcome unexpected hiccups and will ensure everything is tightened and torqued exactly as it should be. Plus, they usually include a proper wheel alignment and might even offer warranty protection on their work.
One of our customers summed it up nicely: "If you’ve never done suspension work before, watching a few YouTube videos might not be enough preparation. There's no shame in going pro and letting someone else handle it."
How Does Installing a Lift Kit Affect My Ford Bronco's Warranty?
This is a big question, especially if your Bronco is still under warranty—and we get why you're concerned. The good news is, thanks to the Magnuson-Moss Warranty Act, your entire vehicle warranty doesn't automatically get canceled just because you install aftermarket parts like Ford Bronco Lift Kits.
Here's how it works: If a dealership can prove that your lift kit directly caused a component failure, they can deny warranty coverage specifically for that part or system. But installing a lift kit does not void your entire warranty outright.
To help safeguard your warranty, we strongly recommend chatting with your local Ford dealer first. Keeping records of your lift kit components and installation documentation can also help. Plus, choosing quality parts from reputable manufacturers (like those we offer at Rad Bronco Parts) makes warranty conversations much easier.
Bonus: Some lift kits—such as the Ford Performance systems—have their own warranties (typically 3-year/36,000-mile) when installed by certified technicians. Just be sure to confirm this with your dealer beforehand.
As always, a professional installation by a Ford dealer or certified technician can offer additional assurance and protect your warranty.
What Are the Effects of a Lift Kit on My Bronco's Handling and Performance?
Installing a Ford Bronco Lift Kit gives your vehicle awesome off-road advantages like improved ground clearance, better approach/departure angles, and greater suspension articulation—but it also changes how your Bronco handles both on the road and off.
On pavement, lifting your Bronco raises its center of gravity. You'll likely notice a bit more body roll when cornering, and your steering might feel slightly different or less responsive at highway speeds. Braking distances may increase too, especially if you've added larger tires. Don't worry, though—high-quality kits keep these changes minimal, and most drivers adjust quickly.
Off-road, however, is where your lifted Bronco truly shines. You'll clear larger rocks, logs, and obstacles with ease. You'll comfortably tackle steeper inclines and declines thanks to those improved angles, and the extra articulation will smooth out uneven trails beautifully.
One customer described his first lifted ride perfectly: "The first trail ride we took it on, it ate up every bump and large rock the road threw at us. Cornering was surprisingly smooth."
After your lift kit install, take some time to get familiar with your Bronco's new handling characteristics. Start easy: take corners a bit slower, give yourself some extra braking room, and be sure to watch out for height restrictions—parking garages, drive-thrus, and even your home's garage door!
You'll quickly get used to your lifted Bronco's new driving style, and most importantly, you'll love the added capability on your off-road trips.
Investing in quality parts and having your lift kit properly installed—whether by yourself or a professional—makes a big difference in how your Bronco performs, handles, and stays reliable on all your journeys.

Conclusion
Installing a Ford Bronco Lift Kit is more than just an upgrade—it's a total change for your Bronco. From dramatically boosting your off-road capabilities to giving your ride an impressive, head-turning stance, this upgrade truly lifts your trip experience.
Throughout this guide, we've walked through every step of the installation process: gathering essential tools, preparing your vehicle and workspace, carefully removing factory suspension parts, installing your new lift kit components, and thoroughly checking everything to finalize your installation safely.
The importance of proper preparation cannot be overstated. Ensuring you have the right tools and a clear workspace sets the stage for a smooth and frustration-free installation. Likewise, carefully selecting the lift kit that matches your Bronco model, desired lift height, and driving needs ensures maximum performance and safety. Following accurate torque specifications during installation is essential—it prevents loose components and keeps your Bronco safe and responsive on and off-road.
Once your lift kit is installed, getting a professional alignment is critical. Skipping this step may lead to uneven tire wear and poor handling, taking away from your Bronco's impressive new abilities. After approximately 500 miles, take the time to retorque all suspension hardware and routinely inspect your kit to ensure everything remains secure. Regular maintenance checks will keep your Bronco performing at its best and prevent small issues from becoming big headaches.
While many Bronco enthusiasts successfully handle lift kit installations at home, always be honest about your mechanical skills and comfort level. There's absolutely no shame in calling in a professional if you're unsure about any step—your safety and peace of mind matter most!
At Rad Bronco Parts, we're proud to offer high-quality, precision-engineered Ford Bronco Lift Kits that provide exceptional performance, durability, and reliability. Our kits are designed to handle the toughest trails while maintaining the comfortable ride you expect on daily drives.
As one of our satisfied customers, Ivan Montaño, shared: "When I finally installed it and saw the Bronco for the first time, my first impression was that it looked amazing. But the best of all was trying it. I did not expect the change to be so much. You really feel the high quality."
Whether you're gearing up for adventurous weekend trips or simply want your Bronco to stand out on the road, installing a quality lift kit is one of the most impactful improvements you can make. With improved ground clearance, the ability to fit larger tires, and significantly better off-road capability, you'll open up a world of new trips.
For more information on our outstanding range of Ford Bronco Lift Kits and accessories, check out our 2024 Bronco Parts Catalog. At Rad Bronco Parts, we've got everything you need to transform your Bronco into the capable, trail-ready vehicle you've always dreamed of.

Now go out there, enjoy your newly lifted Bronco, and conquer some trails. Happy driving from all of us at Rad Bronco Parts!